
PatchCleaner Download: The Best Free Tool to Safely Delete Orphaned Windows Update Files
Have you ever noticed that your computer’s C: drive seems to shrink all by itself? You install a few Windows updates, use your PC normally for a few months, and suddenly you see a scary “Low Disk Space” warning. For many Windows users, especially those with 128GB or 256GB SSDs, this is a frustrating reality. You haven’t installed any massive games or new software, yet dozens of gigabytes have vanished into thin air.
The hidden culprit is often the C:\Windows\Installer and C:\Windows\WinSxS folders. Every time Windows installs an update, patch, or service pack, it leaves behind “orphaned” files—old versions of components that are no longer needed. Microsoft’s own Disk Cleanup tool often ignores these, leaving you stuck.
Enter PatchCleaner, a lightweight, free utility developed by HomeDev. Unlike bloated “PC optimizers” that promise the world but deliver little, PatchCleaner does one thing exceptionally well: it scans your system for leftover patch files and lets you delete or move them safely. In this comprehensive guide, I’ll walk you through exactly how PatchCleaner works, its key features, and whether it’s the right tool to reclaim your precious storage space.
Software Overview
PatchCleaner is a specialized, portable-style utility designed exclusively for Windows. Its sole purpose is to identify and manage “orphaned” files within the Windows\Installer directory and other patch-related locations. These files accumulate over time as you update software (like Adobe Reader, Java, or Microsoft Office) or install Windows cumulative updates.
What makes PatchCleaner unique is its safety-first approach. Instead of simply flagging large files for deletion, it cross-references every file against your current system registry. If a patch file is still referenced by an installed application or Windows component, PatchCleaner marks it as “In Use” and leaves it alone. Only files with no corresponding registry entry—the orphans—are flagged for removal.
The software has gained a cult following on forums like Reddit and TenForums, with users reporting recovered storage ranging from 10GB to an astonishing 50GB on older systems that have been upgraded through multiple Windows versions (e.g., Windows 7 → 8 → 10). Version 1.4.2.0, the latest release, focuses on stability improvements, fixing UI crashes, and enhancing error handling for script issues.
Main Features (Detailed Breakdown)
1. Intelligent Orphaned File Detection
PatchCleaner doesn’t guess which files are safe. It performs a deep scan of your Windows\Installer folder (usually located at C:\Windows\Installer) and cross-references every .msi and .msp patch file with the Windows Registry. This ensures that only files with zero active references—genuine orphans—are presented to you. This prevents accidental removal of critical uninstall data.
2. Dual Cleaning Modes: Move vs. Delete
This is the standout safety feature. Unlike most cleaners that only offer deletion, PatchCleaner gives you two options:
- Move Files: This creates a backup folder (you choose the location, like an external drive or D: partition). The tool moves all orphaned files there. You can use your system for a few weeks to ensure everything works, then manually delete the backup. This is the recommended option for cautious users.
- Delete Files Permanently: For advanced users who are confident, this option removes the orphaned files immediately, freeing up space without a backup step.
3. Clean, Non-Intrusive User Interface
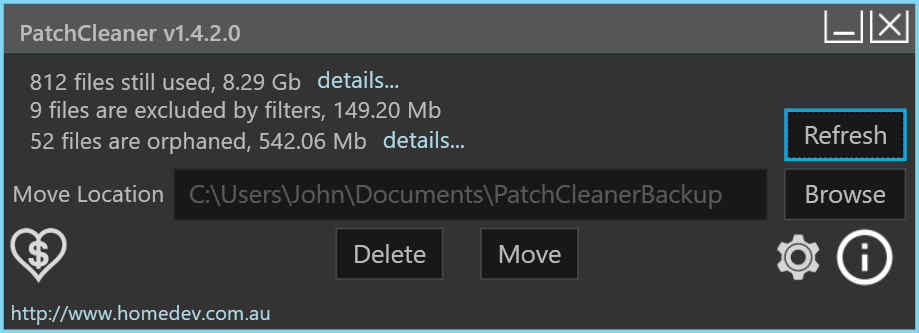
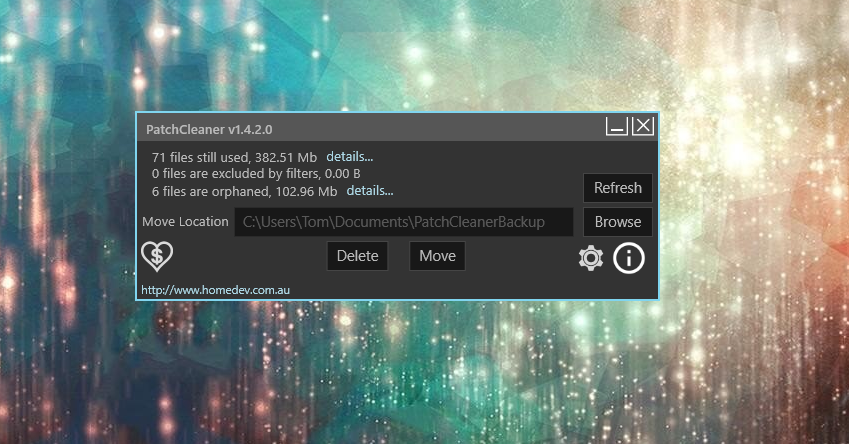
PatchCleaner follows the “it just works” philosophy. Upon launch, you see a single window with a “Search” button. Once the scan completes, the interface clearly categorizes results into three groups: Orphaned Files (safe to clean), In Use (leave alone), and Missing Files (referenced but not found). Everything is displayed in a sortable table with file names, sizes, and dates.
4. Detailed File Information
Before you clean anything, you can click on any detected orphaned file. PatchCleaner shows you its full path, version number, and the date it was created. This transparency is rare in free tools and allows IT professionals to audit exactly what will be removed.
5. Lightweight and Portable
The installer is under 2 MB. More importantly, after installation, the main executable can be copied to a USB stick and run on any Windows machine without reinstallation. It writes minimal data to the Windows Registry, leaving no traces behind.
6. Robust Error Handling (v1.4.2.0)
The latest version fixes several crash bugs related to null data conversion and vbScript configuration issues. If a file is locked by the system or permissions are insufficient, PatchCleaner now logs a clear error message instead of crashing, improving reliability on locked-down corporate PCs.
System Requirements
To ensure PatchCleaner runs smoothly, your system should meet the following minimal requirements. The good news is that it works on everything from old Windows 7 laptops to the latest Windows 11 gaming rigs.
| Component | Minimum Requirement |
|---|---|
| Operating System | Windows 7, Windows 8, Windows 8.1, Windows 10, Windows 11 (both 32-bit & 64-bit) |
| Processor | 1 GHz or faster (any modern CPU) |
| RAM | 512 MB (1 GB or more recommended) |
| Hard Disk Space | 100 MB for the program files + additional space for backup (if you choose the Move option) |
| Additional Software | .NET Framework 4.5 or later (Windows 8+ includes this; Windows 7 may need a manual update) |
| Permissions | Administrator privileges (required to scan the Windows Installer folder) |
How to Install and Use PatchCleaner (Step-by-Step)
Follow these instructions carefully to safely recover storage space. Always choose the “Move” option on your first run.
Installation Steps
- Download the latest version (1.4.2.0) from a trusted source like CNET Download or the developer’s official page.
- Locate the downloaded
PatchCleaner_Setup.exefile. Right-click it and select “Run as Administrator” – this is critical for the tool to access system folders. - Accept the User Account Control (UAC) prompt.
- Follow the simple setup wizard. Choose the default installation folder (
C:\Program Files\PatchCleaner). - Once installed, launch the program from your Start Menu (again, right-click > Run as Administrator).
How to Clean Orphaned Patch Files
- Start a Scan: In the main PatchCleaner window, click the “Search” button (green magnifying glass). The tool will scan
C:\Windows\Installer. This takes 1-3 minutes depending on folder size. - Review Results: After the scan, look at the top of the window. You will see a summary: “Orphaned files: X files – Y GB.” Click on the “Orphaned” tab to see the full list.
- Choose an Action (Crucial): Click the “Cleanup” dropdown menu. You have two choices:
- Recommended: Select “Move files to folder…” Choose a location on a different drive (e.g.,
D:\PatchCleaner_Backup) or an external USB drive. Click OK. - Advanced only: Select “Delete files permanently” if you are absolutely sure you will never need to uninstall an old update.
- Recommended: Select “Move files to folder…” Choose a location on a different drive (e.g.,
- Execute: Click the “Cleanup” button. PatchCleaner will either move or delete the orphaned files. A progress bar will appear.
- Verify & Reboot: Once complete, close PatchCleaner and restart your computer. Check your C: drive free space – you should see a dramatic increase. Keep the backup folder for 2-4 weeks. If no software breaks, you can delete it.
Pros and Cons (Balanced Analysis)
Pros ✅
- Extremely Effective: Recovers space that Windows’ own tools ignore. User reports of 20-40GB recovered are common.
- Safety First: The “Move” option provides an undo button. No other free cleaner offers this for patch files.
- Lightweight & Fast: The scan takes minutes, not hours. The program uses under 50 MB of RAM.
- No Bloatware: Does not include registry cleaners, startup managers, or browser toolbars. It does one job well.
- Free for Personal Use: No premium tiers, no nag screens, no time limits.
- Transparent: Shows you every single file before cleaning.
Cons ❌
- Very Narrow Focus: It only cleans Windows Installer patch files. It won’t clear browser cache, temporary files, log files, or Recycle Bin.
- Not for Beginners Without Guidance: A novice user might accidentally delete the backup folder immediately or run it without Administrator rights (causing a failed scan).
- Outdated UI: The interface looks like a Windows XP-era application. It’s functional but not modern.
- No Scheduled Scans: You have to manually run it every few months. There’s no automatic cleaning scheduler.
Practical Use Cases & Benefits
Use Case 1: The SSD Starvation Scenario
User: Someone with a 128GB or 256GB boot SSD who has performed multiple Windows feature updates (e.g., 22H2 to 23H2 to 24H2).
Benefit: PatchCleaner can free 15-30GB, extending the life of the SSD and avoiding the need to reinstall Windows.
Use Case 2: The IT Technician
User: A system administrator managing old company laptops that were upgraded from Windows 7 to 10.
Benefit: Using the portable version, the technician can run PatchCleaner on multiple machines, moving orphaned files to a network share as a backup before permanent deletion, freeing gigabytes across the fleet.
Use Case 3: The Gamer with a Small Drive
User: A gamer who needs every gigabyte for modern titles (which often require 100GB+).
Benefit: Recovering 20GB from the C: drive allows the installation of one additional AAA game or provides essential headroom for save files and shader caches.
Use Case 4: The Long-Term Windows User (5+ years)
User: Anyone who has not reinstalled Windows in over 3 years and constantly sees low space warnings.
Benefit: This is where PatchCleaner shines the most. One user in the CNET reviews reported recovering 37.2 GB from a 47.24 GB Installer folder. That’s a 78% reduction, making an unusable PC feel new again.
Frequently Asked Questions (FAQ)
Q1: Is PatchCleaner safe? Will it break my installed programs or Windows?
A: When used correctly with the “Move” option, it is considered very safe. PatchCleaner only targets files that are no longer referenced in the Windows Registry. Your installed programs and Windows components have no need for these orphaned files. Thousands of user reviews confirm that moving or deleting these files did not cause any system instability. However, always create a full system backup before using any cleaning tool as a best practice.
Q2: What is the difference between PatchCleaner and Disk Cleanup (cleanmgr)?
A: Microsoft’s Disk Cleanup tool can delete “Windows Update Cleanup” files, but it often leaves many orphaned files behind, especially from third-party software installers (like old versions of iTunes, Zoom, or Adobe products) stored in the Windows\Installer folder. PatchCleaner is more thorough and finds files that Disk Cleanup misses entirely.
Q3: I don’t see the “Move” option. Why?
A: The “Move” option is only available when you run PatchCleaner as an Administrator. Close the program, right-click its icon, and select “Run as Administrator”. The move feature should then appear in the Cleanup dropdown menu.
Q4: How often should I run PatchCleaner?
A: For most home users, running PatchCleaner once every 3-6 months is sufficient. Run it after you install a major Windows feature update (e.g., the annual 24H2 update) or after uninstalling several large programs.
Q5: Can I use PatchCleaner on Windows 11?
A: Yes, absolutely. PatchCleaner works perfectly on all versions of Windows 11 (21H2, 22H2, 23H2, and 24H2). The Windows Installer technology has not changed significantly, so the tool remains fully compatible. Just remember to run it as Administrator.
Q6: What if I delete the files and a program stops working?
A: If you used the “Delete” option and a program breaks (rare, but possible with very old, poorly coded software), your only recovery method is to restore from a backup or reinstall that specific program. This is why the article strongly recommends using the “Move” option first. Keep the moved files on an external drive for one month. If everything works, delete them.
Conclusion: Is PatchCleaner Worth Downloading?
If you are tired of seeing a full C: drive and have tried every other free cleaner without success, PatchCleaner is not just worth downloading—it may be the only tool that solves your specific problem. It is a perfect example of a “Swiss Army Knife” being replaced by a specialized scalpel. Where CCleaner or BleachBit might recover 2-4 GB of temporary files, PatchCleaner can recover 20-40 GB of hidden, orphaned patch data.
The software has a near-perfect user rating on CNET and similar platforms precisely because it solves a painful problem that Microsoft has never adequately addressed. The safety net of the “Move” feature makes it accessible to cautious users, while the portable, lightweight nature appeals to IT pros.
However, it is not an all-in-one PC cleaner. You will still need to manage your browser cache, Downloads folder, and Recycle Bin manually or with another tool. But for its intended purpose—cleaning the Windows\Installer folder—PatchCleaner is quite simply the best free tool available.
