XMEye VMS for Windows- Your Guide to Professional Surveillance Management
Introduction
In today’s world, keeping an eye on your property—whether it’s your home or business—has become more accessible than ever. Video surveillance systems are no longer just for large corporations; they are a common part of modern security. However, managing these systems can sometimes feel like a puzzle, especially when dealing with different types of cameras and recorders. This is where software like XMEye VMS comes into play. It acts as a central command center for your security cameras, right from your Windows computer. This article will explore what XMEye VMS is, what it does, and who it’s for.
What is XMEye VMS?
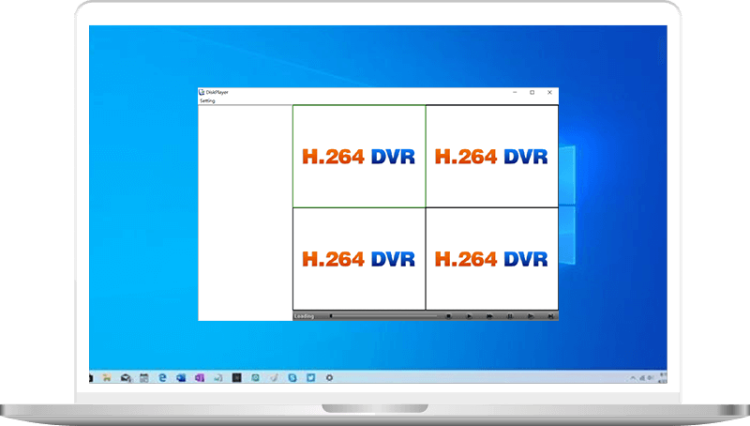
XMEye VMS is a free software application designed for Windows computers to help you manage and monitor your security camera system . Think of it as a universal remote for your surveillance setup. It’s built to work with a variety of devices, including IP cameras, DVRs (Digital Video Recorders), and NVRs (Network Video Recorders). The software provides a single, unified interface where you can view live feeds, record video, and manage your devices without juggling multiple apps or interfaces.
A Cross-Platform Ecosystem
While this article focuses on the Windows version, it’s important to know that XMEye is part of a larger software ecosystem. The developers have also created mobile apps for both Android and iOS devices . This allows users to check their surveillance feeds from anywhere in the world using a smartphone or tablet. The convenience of this cross-platform availability makes it a popular choice for both home and business users who want to stay connected to their security setup while on the move.
Key Functions at a Glance
At its core, XMEye VMS provides three main functions:
- Live Viewing: Watch real-time video from your cameras directly on your PC screen .
- Recording and Playback: Save video footage to your computer’s hard drive and review past recordings .
- Device Management: Add, organize, and remove cameras and recorders from a single, central interface.
Key Features and Capabilities
What makes XMEye VMS a noteworthy tool? Let’s break down its key features.
Support for Multiple Devices
One of the software’s standout features is its ability to connect and display feeds from a large number of devices. XMEye VMS is capable of handling up to 64 devices simultaneously . This makes it suitable for complex installations, such as retail stores, office buildings, or warehouses with many cameras. Whether you have a small home setup with a few cameras or a large business installation, the software is designed to scale with your needs.
Cloud-Based Access
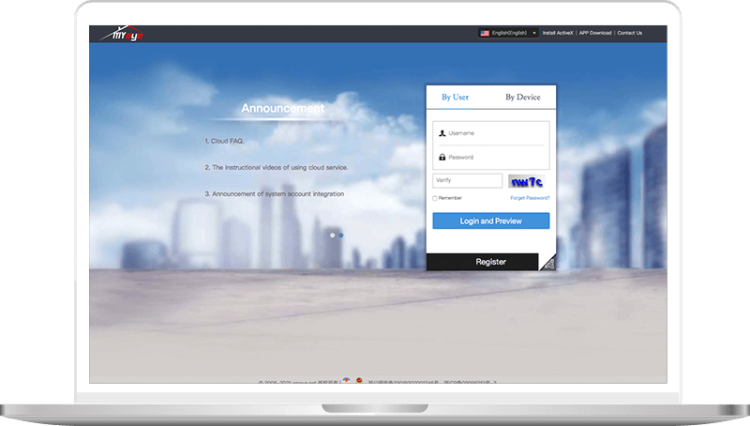
Remote access is a crucial aspect of modern surveillance. XMEye VMS offers cloud-based access, which simplifies the process of logging in to view your live feeds securely from outside your local network . Instead of dealing with complex router configurations and port forwarding, the software can utilize cloud technology. This often involves connecting to your devices using a unique “Cloud ID” or serial number, making the connection process much more user-friendly .
Local Recording and Playback
The software provides tools for local recording, allowing you to save video footage directly to your computer’s hard drive. This is a vital feature for creating a record of events. However, a key detail to be aware of is that the recorded files are encrypted. This means they can only be viewed using XMEye’s own dedicated media player, which helps maintain security but limits flexibility if you want to use a different player .
An Organized Workspace
The user interface, while potentially daunting at first, is designed for organization. It provides a unified workspace for you to navigate between different cameras and access playback controls . You can view multiple camera feeds on a single screen, switch between different views, and quickly find the device you need to check. You can even set up a recording plan to automatically capture footage on a schedule .
System Requirements and Installation
Before you download XMEye VMS, it’s helpful to know what you need.
Operating System Compatibility
The Windows version of XMEye VMS is compatible with a wide range of Microsoft operating systems. It officially supports Windows 7, 8, 8.1, 10, and 11 . The file size is around 67 MB, and the current version is 2.0.1.18, though newer builds may be available .
Considerations for Installation
While the software itself is free, setting it up can be a bit technical. The initial configuration may require some knowledge of networking, such as understanding IP addresses and router settings, to ensure all devices are discovered and connected .
Furthermore, for the software to function correctly, you may need to make some adjustments to your computer’s security settings. Some users have reported that they needed to temporarily disable their antivirus protection or firewall during installation and setup to allow the program to communicate with the DVR or NVR . It’s important to remember to re-enable these protections after the software is configured.
Storage Advice
If you plan on using XMEye VMS for regular recording, you should consider your storage needs. The software allows you to choose where to save video files, with a D: drive often being recommended to avoid filling up your primary system drive . It’s generally advised against using a standard PC hard drive for 24/7 surveillance recording, as this can cause significant wear and tear. If continuous recording is a high priority, using a dedicated server with a hard drive designed for surveillance is a better long-term strategy .
How to Connect Your Devices
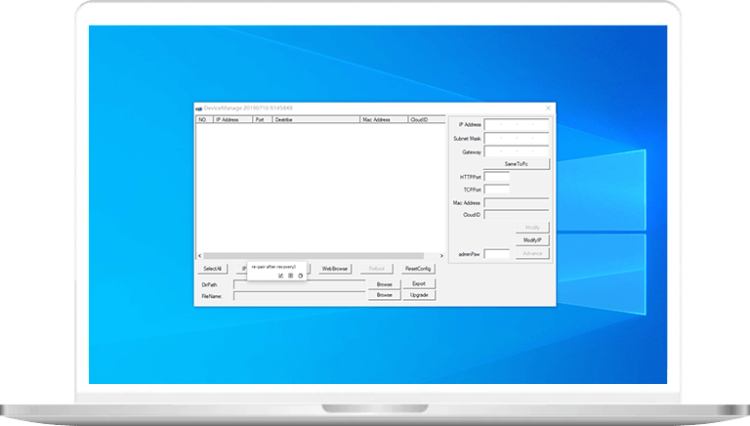
Connecting your camera or recorder to XMEye VMS is a critical step. The process can generally be done in two ways, one automatic and one manual. The exact steps might vary slightly depending on your device’s model.
Option 1: Automatic Device Discovery
For some devices, especially if they are on the same local network as your computer, XMEye VMS can find them automatically. The process generally involves:
- Log in to the client: The default username and password is often “admin” / “admin” or “admin” with a blank password .
- Automatic Addition: Once logged in, the client might automatically search for and display any compatible DVR or NVR systems it finds on the same network .
- Confirmation: If it finds a device, it might prompt you to confirm its addition.
Option 2: Manual Addition Using Cloud ID
If your device isn’t found automatically, you can add it manually. This is a more reliable method, especially for remote access.
- Find the Device’s Cloud ID: This is typically a long serial number for your DVR or NVR. You can usually find it on the device’s own interface, often under a “System” or “Version” menu .
- Open the “Manual Add” Menu: In the XMEye VMS software, look for an option like “Manual Add” .
- Select “Cloud ID” Login: In the add device window, change the login type from “IP” to “Cloud ID” .
- Enter Information: Provide a name for the device (e.g., “Front Door Cam”). Enter the “Cloud ID” (the serial number you found). Finally, enter the system password for the DVR or NVR. By default, this may be blank .
Once added, the device should appear in your device list, and its status should change to “Connected” . After this, you can go to the “Live View” section to start watching the video feeds .
Pros and Cons
Like any software, XMEye VMS has its strengths and weaknesses.
Pros
- Free to use: No license fees or hidden costs make it very accessible.
- Supports multiple devices: Can handle up to 64 devices, suitable for large systems .
- Remote access: Cloud-based access allows monitoring from anywhere .
- Secure recording: Encrypted files add a layer of security to your footage .
Cons
- Technically challenging setup: May require some networking knowledge and firewall adjustments .
- Encrypted files: Videos can only be played with the proprietary media player, limiting flexibility .
- Mobile app quality: Recent reviews of the companion mobile apps have noted issues with intrusive advertisements and connection stability .
Frequently Asked Questions (FAQs)
1. Is XMEye VMS free to use?
Yes, the Windows version of XMEye VMS is completely free to download and use .
2. What types of cameras does XMEye VMS support?
XMEye VMS is designed to support a wide range of devices, including IP cameras, DVRs (Digital Video Recorders), and NVRs (Network Video Recorders) .
3. Can I view my cameras remotely from outside my home network?
Yes, the software uses cloud technology to facilitate remote access. This usually involves connecting to your devices using a unique “Cloud ID” or serial number, which simplifies the setup for remote viewing .
4. Why is the setup for XMEye VMS considered difficult?
The main challenge is the network configuration. To connect your computer to the DVR/NVR, you may need to understand IP addresses and possibly adjust your firewall or antivirus settings to allow the devices to communicate .
5. I can’t play the video files I recorded with XMEye VMS. Why?
The software records video in an encrypted format to protect your data. These files are designed to be secure and can only be played using the proprietary media player provided by XMEye . This is a security measure, although it does limit playback flexibility.
Conclusion
XMEye VMS for Windows is a powerful, free tool that provides a centralized platform for managing video surveillance systems. Its ability to support up to 64 different devices and facilitate remote viewing through cloud technology makes it a versatile choice for both home and business users. The software offers secure recording and an organized interface for managing your surveillance network.
However, its power comes with a caveat: the setup can be technically demanding. Users who aren’t comfortable with network configurations might find the initial process a hurdle. While this guide has outlined the basics, remember that the specific steps can vary. For the most accurate instructions, it is always best to refer to the official user manual for your specific DVR or NVR model or the official XMEye website.
Despite some challenges, for those who can navigate the setup, XMEye VMS is a reliable and comprehensive solution for professional-grade security monitoring.